Posts about living in, understanding, and finding the best of mavenhood.
The Digital Magazine

It’s often slight puffiness that comes and goes around the jaw that you see first, or something you can’t quite put a finger on, but your face looks different from week to week. Your typically defined features have started to show up inconsistently.
Whether there are products in your cabinet targeting individual skin issues, or a to-do list that includes “research skincare routines,” gua sha is a strong addition. It works beneath the surface of the skin, supporting your regimen rather than replacing it.
Midlife looks the way it does because you’ve made deliberate choices and practiced consistent self-care. In a considered multi-step approach, products work on the surface of the skin, while gua sha works with how your face functions beneath it.
Circulation, Fluid, Tension
In midlife, the changes in your face are both circulatory and structural.
Circulation shifts, and that affects how your skin looks throughout the day. Fluid moves differently through the face, particularly around the eyes and along the lower half of the face. Muscle patterns that have been in place for decades now influence how your features look.
Gua sha addresses all three directly: circulation, structure, and muscle patterns. It uses a smooth tool moved across the skin to stimulate circulation, sometimes bringing a bit of redness with it, known as “sha.” It works through muscle tension similarly to myofascial release, helping the tissue respond and, over time, change how your features sit at rest. It also moves fluid through the face, affecting definition.
The results of facial gua sha are cumulative. Women who use it consistently report seeing more definition, less day-to-day fluctuation, and reliably looking more like themselves.
Post-session glow and de-puffing are the easiest to see immediately. More consistent changes in texture and firmness typically appear after about three weeks of regular practice. For longer-term shifts in contour and definition, many women report seeing noticeable results after about eight weeks.
“From a Chinese medicine view, stagnation is the root. When circulation and lymph slow, the face appears puffy, dull, and undefined. Gua sha reawakens that flow—simply and directly.”
— Lotus Huang, L.Ac, Founder of Lotus Heals
The Tension Your Face Is Holding
Many women are carrying more facial tension than they realize.
The jaw can hold a significant amount of tension, and the brow can stay engaged through long stretches of concentration. Over years, those patterns settle in and influence the outline of the face and how your features read.
Working with that tension, even lightly and regularly, produces a cleaner outline and a more natural look. This shift is one of the more immediate things women notice with a consistent gua sha practice.
“The face holds tension like the body. Releasing chronic contraction in the jaw, brow, and eye muscles can visibly relax facial posture, often within minutes.”
— Lotus Huang, L.Ac, Founder of Lotus Heals
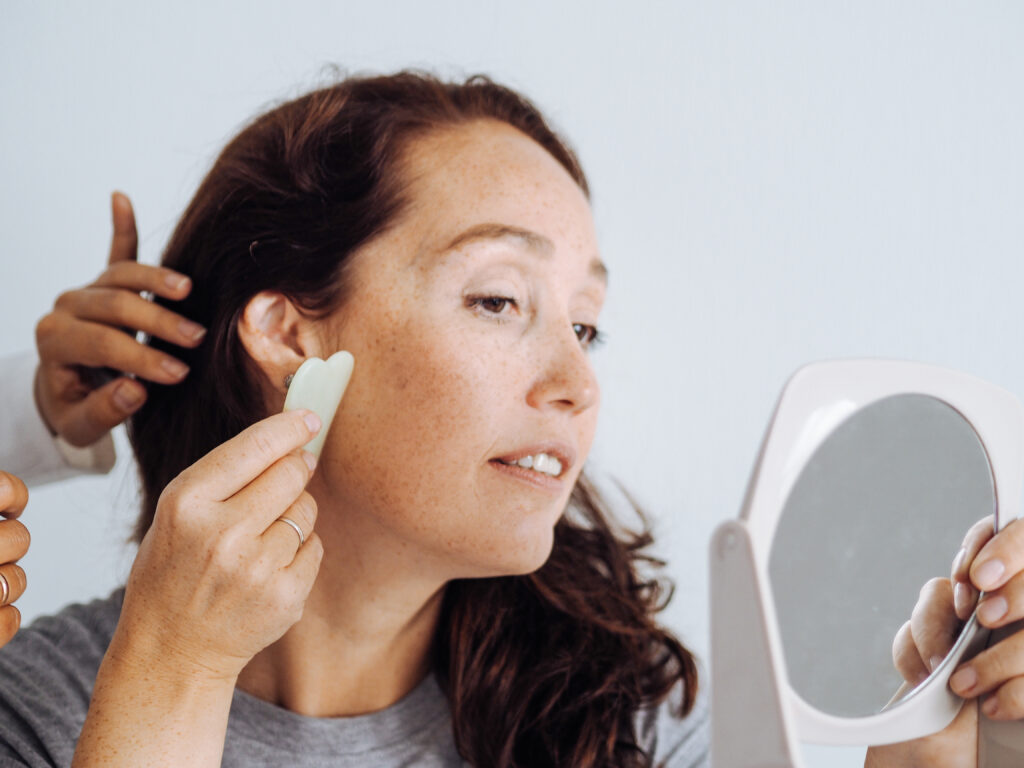
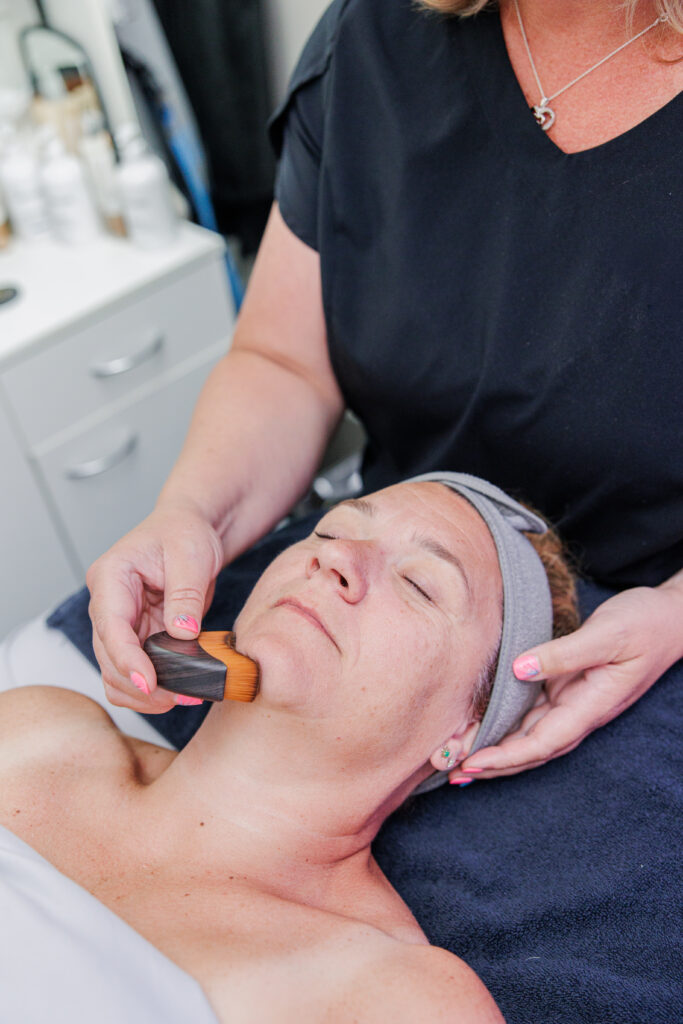
At Home, or With an Experienced Practitioner
A trained practitioner, an acupuncturist, or a specialist esthetician can tailor each gua sha session to what your face specifically needs.
A professional offers experience and precision, and can reach layers of facial tension that are harder to access on yourself.
Many women find the most useful approach is a regular at-home practice combined with a professional session once or twice a month. The professional session sets the tone, and the at-home practice keeps it going in between.
If you’re starting from scratch, and regular sessions aren’t easily accessible, one professional session early on is worth considering. Seeing the technique done well and feeling the correct pressure gives you a more accurate foundation than any tutorial can. For a visual reference, this demonstration offers a clear look at how gua sha is performed in practice: https://lanshin.com/pages/courses
For the face, at-home practice is genuinely effective, with a learnable technique and only light pressure required.
How It Fits into What You’re Already Doing
Gua sha sits at the end of your existing routine, after cleansing and after applying your serum, oil, or moisturizer.
The product on your skin gives the gua sha tool the slip it needs to move properly, and the practice helps drive that product further into the skin as it goes.
The sequence follows the direction of lymphatic flow, starting at the neck, working upward, and sweeping outward from the center of the face, keeping fluid moving out rather than pooling.
Each stroke is repeated three to five times before moving to the next area. The whole thing takes less than ten minutes once you know what you’re doing. Morning and evening both work for different reasons.
Morning sessions address overnight puffiness and give the face a more defined, awake appearance. Evening sessions release the tension that accumulates over hours of concentration, expression, and screen time.
Two to three sessions a week produce real results, and three to five maintain and build on them. For specific areas like jaw tension or under-eye puffiness, daily light sessions with gentle pressure work well.
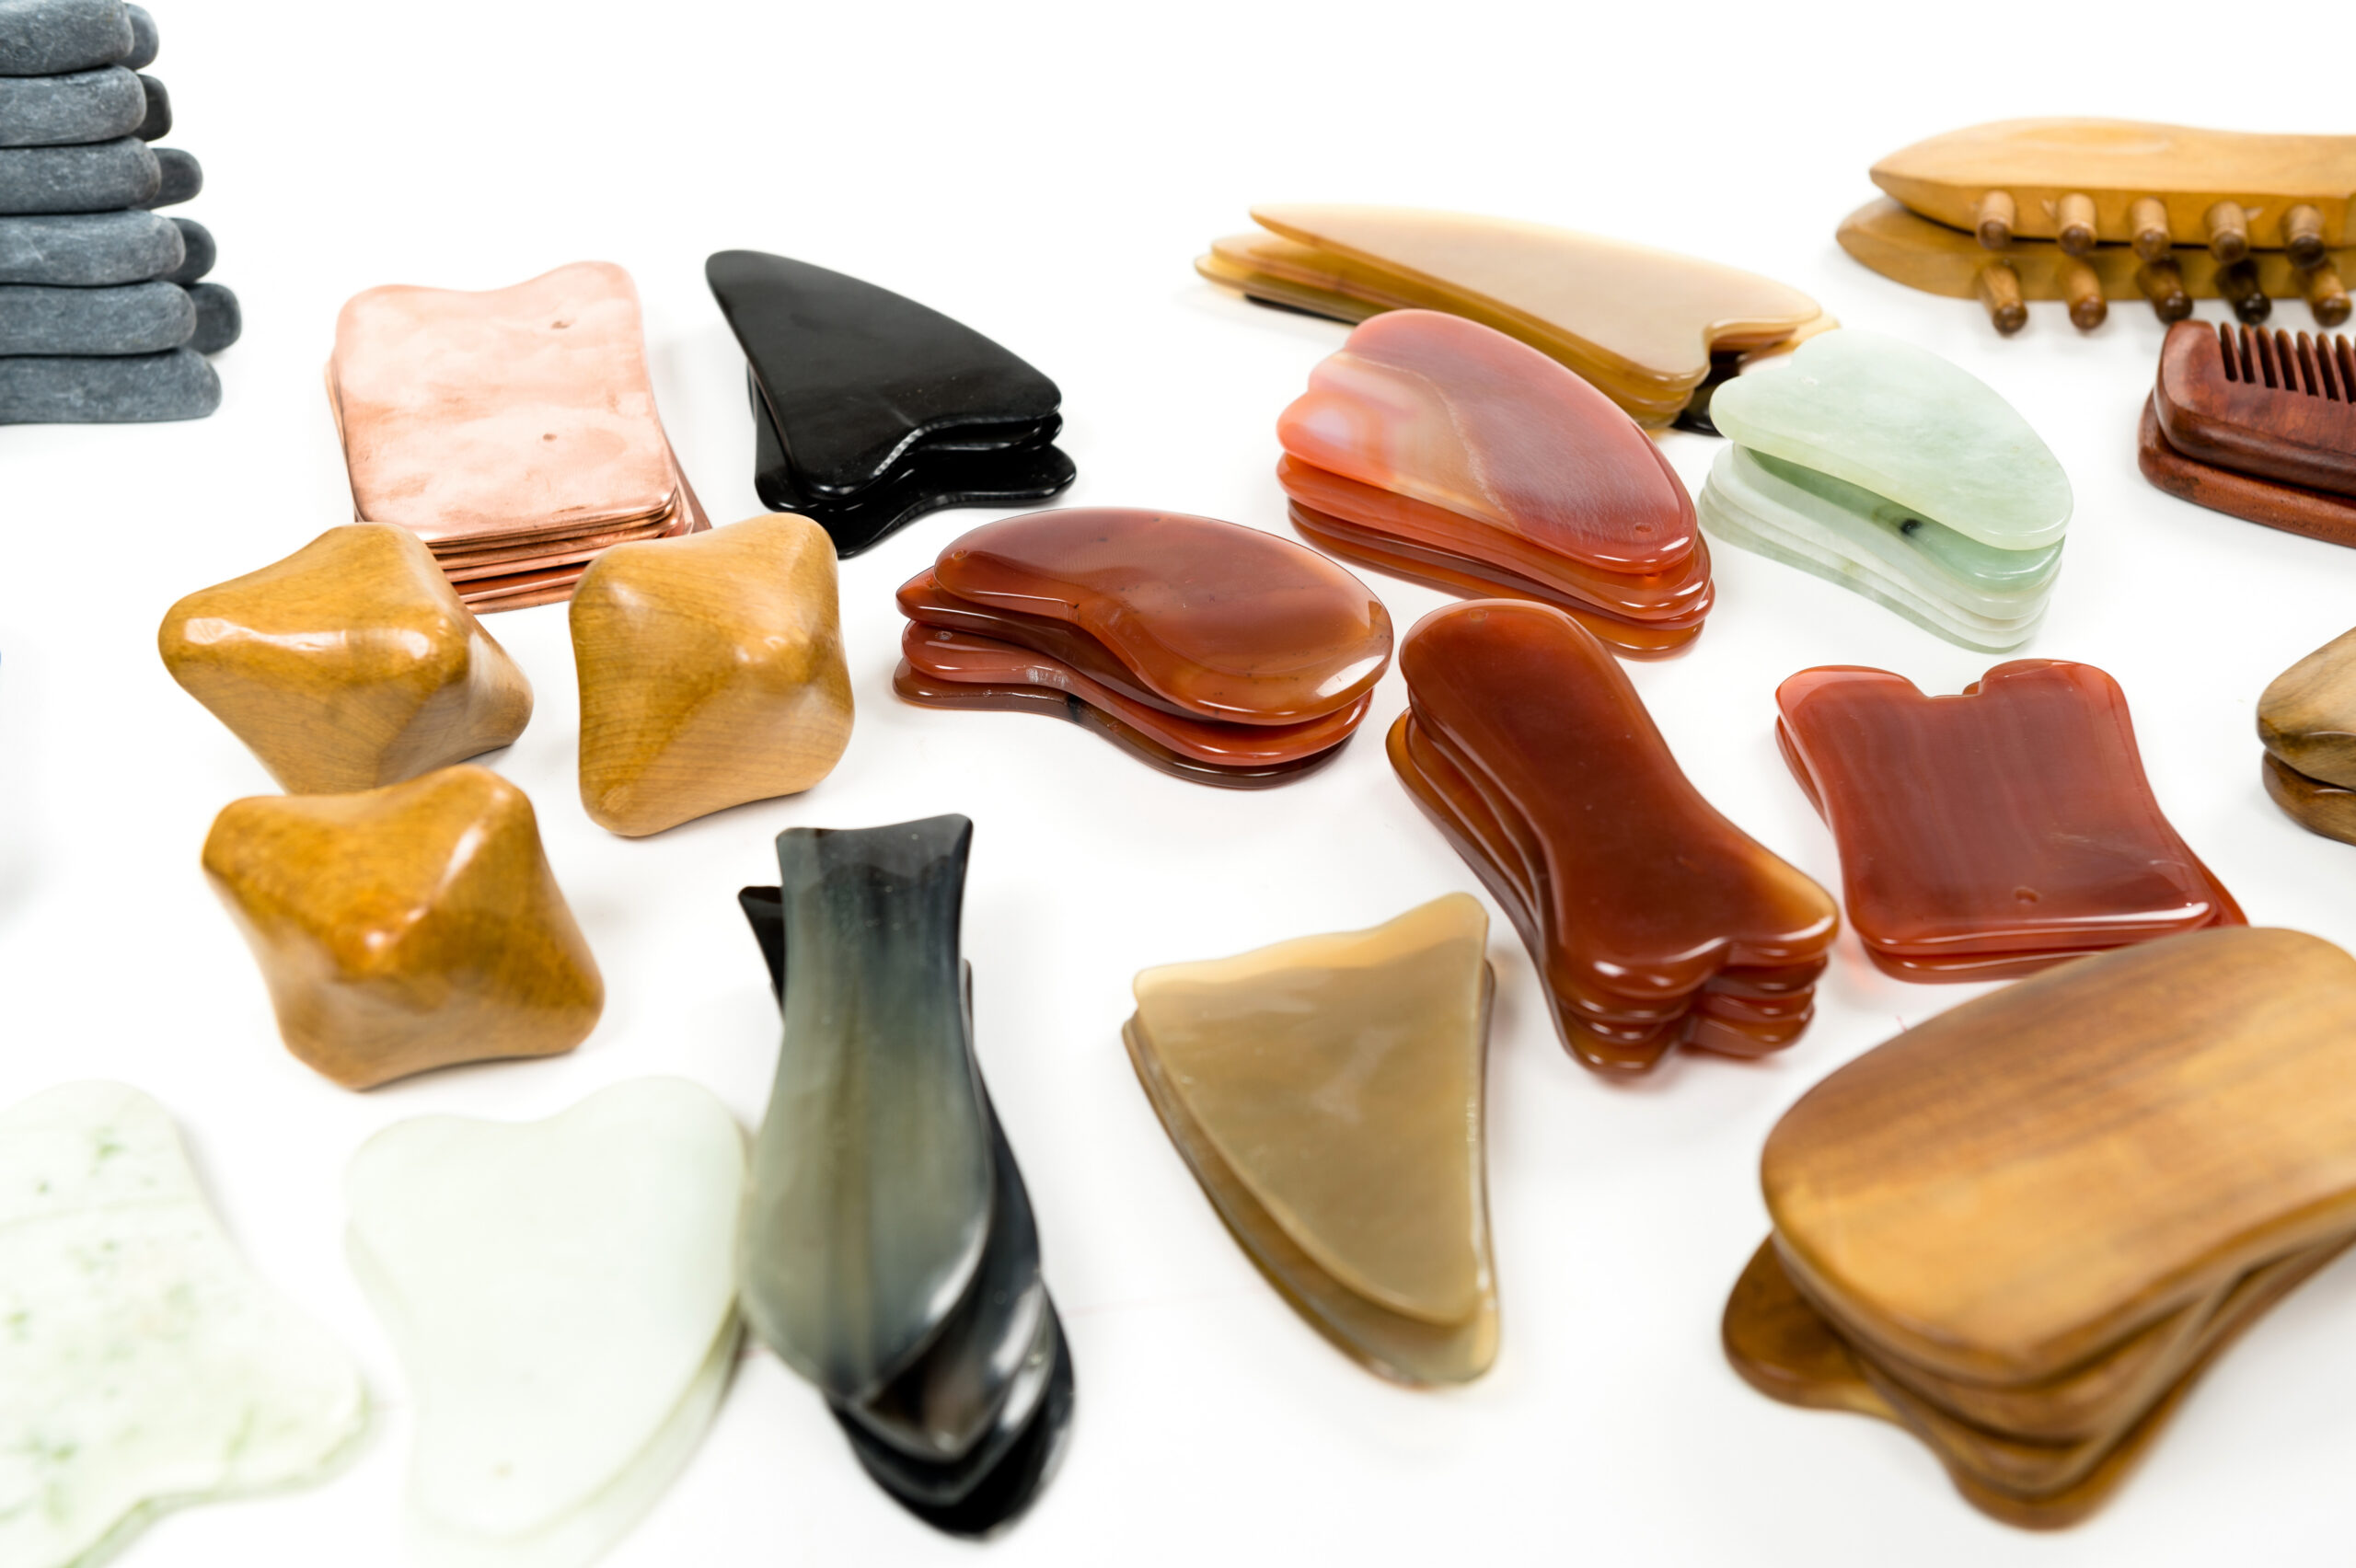
Two Tools, Two Experiences
The traditional gua sha stone offers precision along the jaw, cheekbones, and brow. This tool helps you feel exactly where you’re working and adjust accordingly.
The gua sha brush has become popular, offering ease and lighter contact with faster, broader coverage. Some women use both, reaching for the stone when they have time, and the brush on the days when they want the benefit of gua sha with minimal effort.
What Makes This One Stick
While some additions to a routine feel worthwhile for a few weeks, gua sha earns its place in your long-term care strategy.
Most formal studies have focused on gua sha’s medical applications, including pain relief, inflammation, and circulation. Its facial benefits are discussed far more through experience, and those experiences are consistent.
Cumulative benefits, including more definition and a closer match between how you feel and what you actually see, are part of what makes this over 2000-year-old practice a mainstay.
For a woman who has built her life around deliberate choices, or one who is prioritizing herself now, these kinds of results make sense.
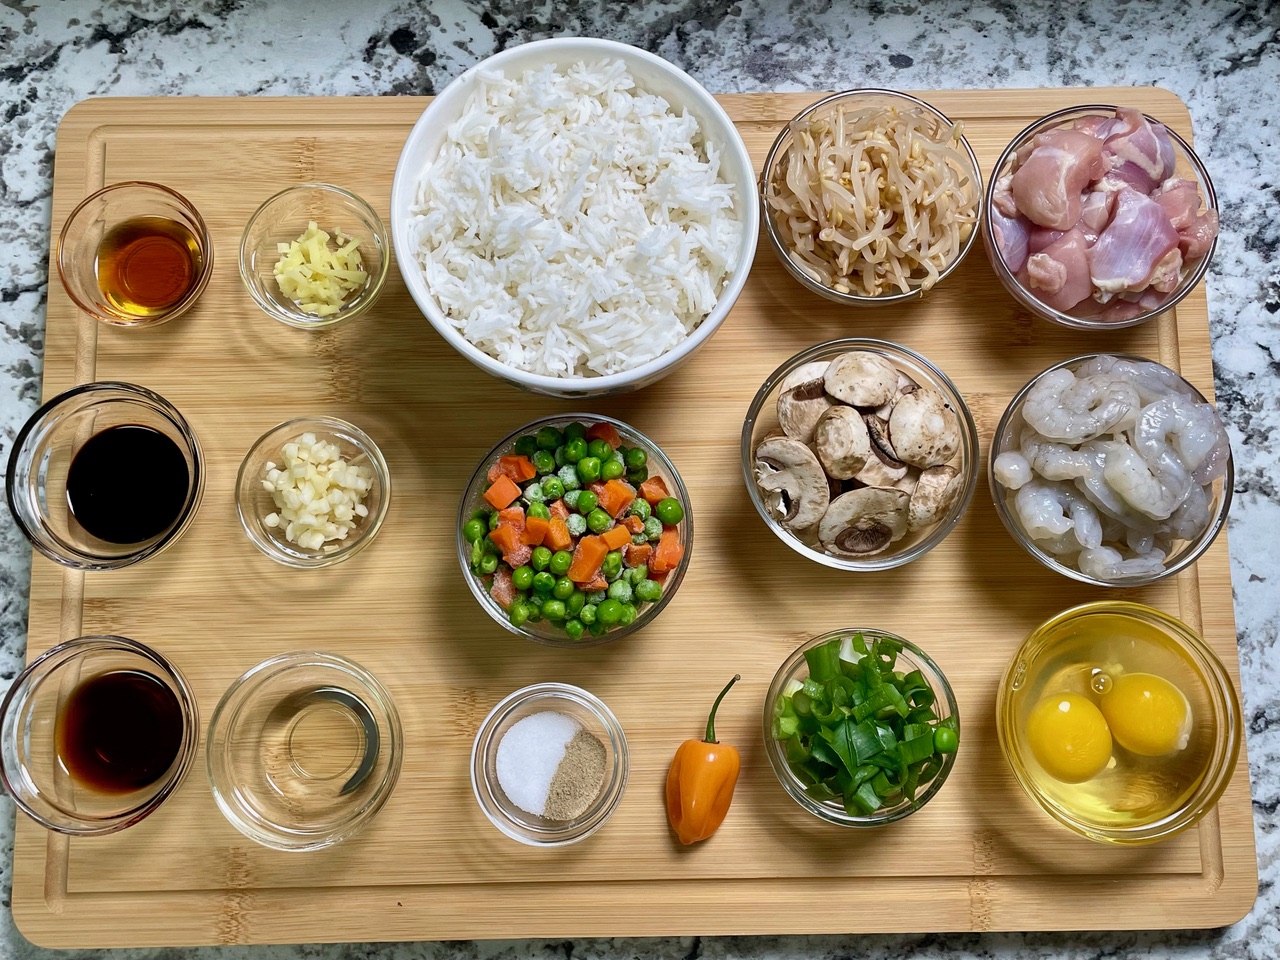
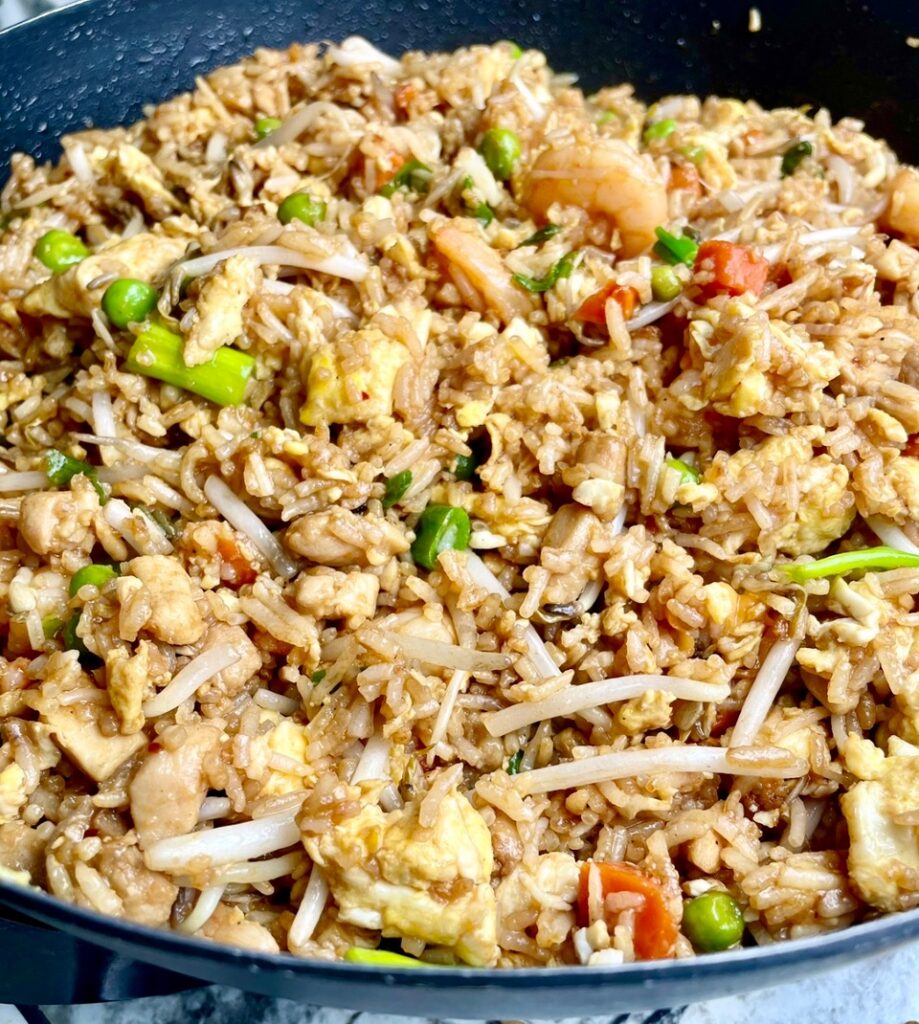
This Chicken & Shrimp Fried Rice is a quick, flavorful weeknight dinner featuring tender boneless chicken thighs, succulent shrimp, fluffy rice, crisp green onions, peas, carrots, with a hint of sesame oil. Ready in just 30 minutes, it delivers bold flavors that rival your favorite takeout.
Ingredients
- 2 tbsp sesame oil
- 2 tbsp vegetable oil or canola oil
- 1 lb shrimp, peeled and deveined
- 1 lb boneless chicken thighs, diced into small cubes
- 1 cup frozen peas and carrots
- ½ cup green onions, chopped
- ½ cup Bean sprouts (Optional)
- ½ cup Mushrooms sliced (Optional)
- 2 cloves garlic, minced
- ½ tsp fresh ginger, minced
- 2 large eggs, lightly beaten
- 2 cups cooked Basmati rice (white or brown)
- 1–2 tbsp low‑sodium soy sauce, to taste
- 1–2 tbsp mushroom soy sauce, to taste
- Salt and white pepper optional, to taste
- ½ habanero pepper optional, to taste
Instructions
- Heat oil & cook shrimp. Place a large nonstick skillet or wok over medium‑high heat. Add the vegetable oil and the optional habanero. When the oil is hot, add the shrimp and sauté 2–3 minutes, stirring occasionally, until pink and cooked through. Remove shrimp and set aside.
- Cook the chicken. In the same skillet, add the diced chicken and stir‑fry until about 80% cooked. Remove and set aside with the shrimp.
- Sauté aromatics. Add sesame oil to the skillet. Once hot, add minced garlic and ginger and stir for 30 seconds until fragrant.
- Cook the vegetables. Add peas, carrots, bean sprouts, mushrooms, and green onions. Stir and cook 2–3 minutes until vegetables begin to soften.
- Scramble the eggs. Push the vegetables to one side of the skillet. Pour the beaten eggs into the empty side and gently scramble until just set. Fold the eggs into the vegetables.
- Combine everything. Return shrimp and chicken to the skillet, then add the cooked rice. Drizzle with soy sauce and mushroom soy sauce to taste and stir to combine. Cook for about 2 minutes until heated through and flavors are blended.
- Serve. Taste and adjust seasoning with salt or white pepper if desired. Serve warm, garnished with extra green onions and sesame seeds if you like.
Tips & Variations
- Rice: Use day‑old chilled rice for best texture; fresh rice can become mushy when stir‑fried.
- Protein swaps: Substitute chicken breast or tofu for a different protein.
- Soy‑free option: Replace soy sauces with coconut aminos for a soy‑free version.
- Heat level: Omit the habanero for mild flavor or add more for extra spice.
Storage
- Refrigerate: Cool completely, store in an airtight container for up to 5 days.
- Freeze: Freeze in freezer‑safe containers for up to 6 months. Thaw and reheat thoroughly before serving.
Enjoy your quick, comforting, and flavorful Chicken & Shrimp Fried Rice.